Getting a flawless shine on your car takes more than just effort. It takes the right technique. One of the most overlooked steps in car detailing is rotating polishing pads. Many people simply press the pad to the paint and start buffing. However, this approach often leads to uneven results, swirl marks, and faster pad wear.
This guide will walk you through everything you need to know about rotating polishing pads the right way. Whether you are a beginner or a weekend enthusiast, these tips will help you achieve better, longer-lasting results every time.
Why Rotating Polishing Pads Matters
Polishing pads carry abrasive compounds across the paint surface. When you use a pad repeatedly without rotating it, product residue builds up on one spot. This causes the pad to work less effectively. Additionally, a clogged pad can drag and create heat, which can damage your paint.
Rotating your pad simply means changing which part of the pad makes contact with the paint at regular intervals. Therefore, you spread the wear evenly, keep the pad cleaner, and maintain consistent cutting or polishing action. The result is a more uniform finish with fewer pass marks.
Understanding the Types of Polishing Pads
Before you start rotating pads, it helps to know what you are working with. Different pads behave differently and wear at different rates.
Foam Pads
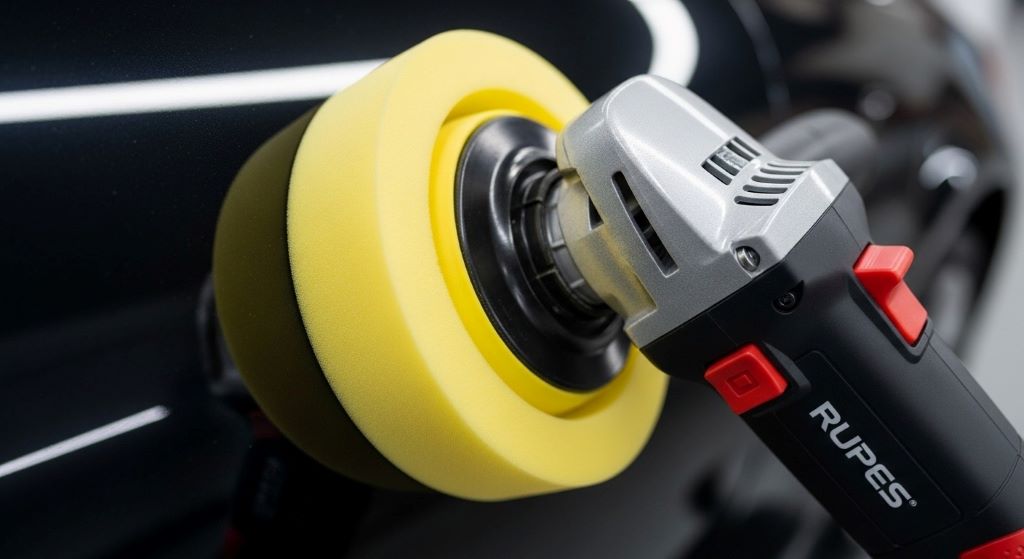
Foam pads are the most common choice among detailers. They are soft, flexible, and available in various densities. Cutting foam pads are firmer and remove more material. Polishing foam pads are softer and refine the surface. Finishing pads are the softest and are used for final gloss enhancement. Foam pads tend to hold compound product, so rotation is especially important with these.
Microfiber Pads
Microfiber pads are more aggressive than foam. They cut faster and are great for removing deep scratches. However, they can generate more heat if not used correctly. Rotating microfiber pads regularly helps prevent heat buildup and ensures the fibers stay lifted for maximum cutting ability.
Wool and Hybrid Pads
Wool pads are very aggressive and are usually used for heavy correction. Hybrid pads combine foam and microfiber for balanced performance. Both types benefit from rotation to prevent uneven loading of the abrasive compound.
Tools You Need Before You Start
Having the right tools makes the rotation process much smoother. Here is what you should have on hand:
- A dual-action (DA) or rotary polisher
- Multiple polishing pads of the same type and size
- A pad cleaning brush or pad cleaning attachment
- A spray bottle with clean water
- A clean microfiber towel for wiping residue
- Your chosen polish or compound
Having multiple pads ready is especially important. This way, you can swap pads without stopping your workflow for a long time. Additionally, it reduces the pressure to overwork a single pad past its useful life.
How to Rotate Polishing Pads Step by Step
Step 1: Prime the Pad Before Use
Always prime a new or clean pad before applying compound. To do this, lightly mist the pad with water. Then, dab a small amount of polish directly onto the pad face. Spread it across the pad surface by hand or by running the polisher at low speed against a soft cloth. This step prevents the pad from absorbing too much product on the first pass and ensures even distribution right away.
Step 2: Apply Product and Begin Polishing
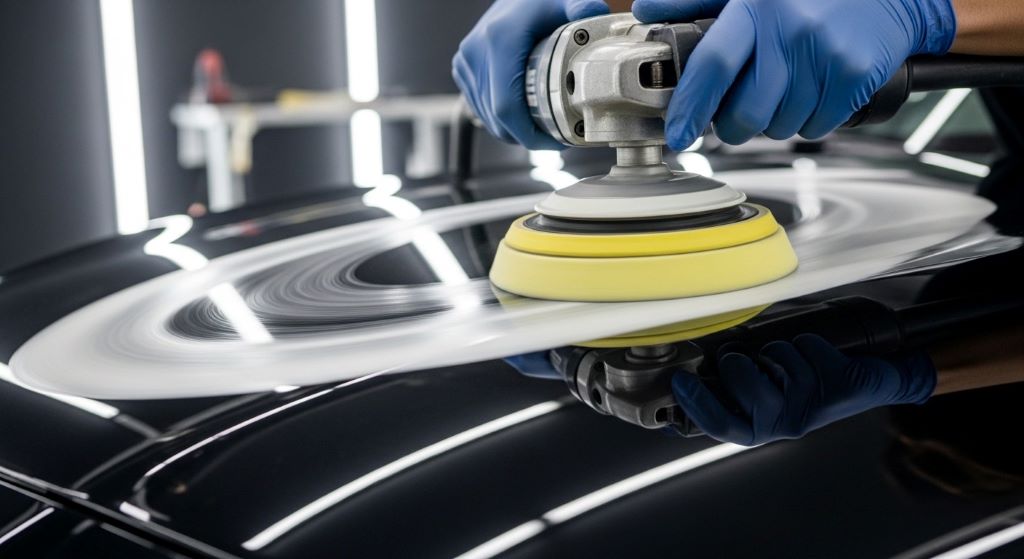
Apply a few pea-sized dots of compound or polish to the pad. Place the pad flat on the paint surface before turning on the machine. Start on a low speed setting and spread the product across a small section. Then increase the speed and work the product in overlapping passes. Keep the pad moving at all times to avoid heat buildup.
Step 3: Clean the Pad During the Session
After every one or two panels, clean the pad while it is still on the polisher. Turn the machine on at low speed and use a pad cleaning brush to clear out the buildup. Hold the brush lightly against the spinning pad. Compound residue and dead paint particles will fly out. This keeps the pad performing at its best without requiring a full swap.
Step 4: Rotate or Swap the Pad
Even with cleaning, pads lose their effectiveness over time during a session. Therefore, it is best practice to rotate to a fresh pad after every two to three panels. Simply remove the used pad from the backing plate and attach a clean, primed pad. Set the used pad aside for washing later. This keeps the cutting ability consistent across every section of the car.
Step 5: Monitor Pad Condition Visually
Occasionally, stop and look at the pad face. A healthy pad face should look slightly moist and even in color. If the pad looks dark, crusty, or glazed over, it needs cleaning or replacement. Additionally, if you notice the polish drying too quickly on the surface, that is a sign the pad is no longer spreading product evenly.
How Often Should You Rotate Pads?
The frequency of rotation depends on several factors. The type of compound matters a lot. Heavy cutting compounds break down faster and load pads more quickly. Additionally, the condition of the paint affects how fast a pad fills with debris. Heavily oxidized or neglected paint will clog pads far faster than lightly used surfaces.
As a general rule, plan to rotate pads every two to three panels on a standard sedan. For larger vehicles like trucks or SUVs, you may need to rotate after every one to two panels. However, always let visual feedback guide your decision. A pad that looks saturated needs to be changed regardless of how many panels you have done.
Washing and Caring for Used Pads
Proper pad care extends the life of your pads significantly. After a detailing session, wash all used pads promptly. Dried compound is much harder to remove and can break down the foam structure.
Rinse the pad thoroughly under warm water. Apply a small amount of pad cleaning solution or mild dish soap. Work it gently into the pad using your fingers. Rinse until the water runs clear. Then, press the water out gently without twisting the pad. Lay the pad face-up on a clean towel to air dry completely before storing it.
Never store a damp pad inside a sealed bag or container. Moisture trapped inside can cause mold to grow, which will ruin the pad and contaminate your polish. Therefore, always ensure pads are fully dry before putting them away.
Common Mistakes to Avoid When Rotating Pads
Even experienced detailers sometimes make avoidable errors. Here are the most common mistakes to watch out for:
- Using a single pad for an entire car without cleaning or rotating it, which causes diminishing results on each panel.
- Pressing too hard on the polisher, which speeds up pad wear and can cause product to be pushed into the pad rather than onto the surface.
- Forgetting to prime new pads, which can cause the compound to be unevenly absorbed in the first few passes.
- Using different types of pads for the same stage of correction, which makes it harder to achieve a consistent finish.
- Storing pads in direct sunlight or in high heat, which breaks down the foam faster over time.
Tips for Getting the Best Results with Pad Rotation
A few small habits can make a noticeable difference in your final results. First, always work on a cool, shaded surface. Heat causes polish to dry quickly, which overloads the pad faster. Additionally, work in small sections of no more than two feet by two feet at a time. This gives you more control and makes the pad rotation easier to manage.
Second, label your pads by stage if you use multiple compounds. For example, keep separate sets for cutting, polishing, and finishing. Cross-contaminating a finishing pad with a cutting compound will leave unwanted scratches. Therefore, clean storage and clear labeling are worth the extra effort.
Third, invest in more pads than you think you need. Many experienced detailers keep at least six to eight pads per type on hand for a full detail. This ensures you always have a fresh pad ready. As a result, you never feel tempted to push an overloaded pad further than it should go.
Conclusion
Rotating automobile polishing pads is a simple practice that delivers a big impact. It keeps your pads performing consistently, reduces heat damage, and helps you achieve a more uniform, professional-looking finish. By priming your pads, cleaning them during use, rotating regularly, and washing them properly afterward, you protect both your paint and your investment in quality detailing tools.
Additionally, avoiding common mistakes like single-pad detailing or improper storage will extend the life of every pad in your collection. Whether you are correcting deep swirls or simply maintaining a well-kept vehicle, good pad habits will always show in the final result. Start applying these techniques on your next detail and notice the difference for yourself.
Frequently Asked Questions
1. How do I know when a polishing pad needs to be replaced?
A pad should be replaced when it shows visible tearing, loses its original shape, or no longer bounces back after compression. If cleaning does not restore its performance, it is time for a new pad. Most foam pads last through several sessions when properly maintained.
2. Can I use the same pads for different stages of polishing?
It is not recommended. Using a cutting pad for a finishing stage, or vice versa, can introduce unwanted scratches or reduce cutting power. Always keep separate pads for each stage and label them clearly to avoid mix-ups.
3. Is a dual-action polisher better than a rotary for pad rotation?
Both types work well with a pad rotation system. However, a dual-action polisher is generally safer for beginners because it generates less heat. Rotary polishers cut faster but require more skill to avoid burning paint. For either machine, rotating pads regularly is equally important.
4. How many pads should I have for a full car detail?
For a complete detail with multiple correction stages, having at least six to eight pads per type is ideal. This ensures you always have a clean pad available and reduces the need to pause mid-session for washing. Having extras also means you can handle larger vehicles without pad fatigue.
5. What is the best way to store polishing pads?
Store pads in a cool, dry place away from direct sunlight and heat. Make sure they are fully dry before storing them to prevent mold. Flat storage is better than stacking pads on top of each other, as pressure can deform the foam over time. Many detailers use individual resealable bags or a dedicated pad carrying case.
Related Topics:
How to Remove Tint From Car Windows: A Step-by-Step Guide
Battling the Drip: Comprehensive Guide to Car Door Seal Water Leak Prevention